Ready to change your room? You can put up LED strip lights by following easy steps. The installation is simple and does not take long. LED strip lights are easy to use in any room. They help you save energy and lower your power bill. LED strip lighting gives you many ways to light up your space. You can use them for main or extra light. These strips bend to fit curved or bumpy places. They work inside or outside your home. DIY lighting projects are fun with these strips. Pick energy-saving lights to make your kitchen, living room, or stairs brighter.
Pick the right LED strip lights for your needs. Use single-color LED strip lights to save energy. Use RGB LED strip lights if you want colorful lights. Measure your space with care. Clean the surfaces before you start. This helps the strips stick well and fit right. Only cut LED strips at the marked spots. Connect the pieces with the right connectors or by soldering. Mount the strips tightly with mounting clips or aluminum channels. This keeps them safe and makes your setup look neat. Make sure your power supply matches the LED strips’ voltage and wattage. Test your setup before you finish. Always follow safety tips to stop problems.

You have many choices when it comes to led strip lights. Each type offers different features and benefits. Take a look at this table to compare the main options:
|
Type of LED Strip |
Signal Control Type |
Voltage Options |
Color Types Supported |
Special Features / Notes |
|---|---|---|---|---|
|
Single-Signal Addressable LED |
Single data line |
5V, 12V, 24V |
RGB, RGBW, Monochrome |
Simple control, one pixel failure affects others |
|
Dual-Signal Addressable LED |
Dual data lines |
5V, 12V, 24V |
RGB, RGBW |
Backup line for reliability, uninterrupted signal |
|
Breakpoint Continuation LED |
Dual data lines with backup |
5V, 12V, 24V |
RGB, RGBW |
Switches to backup line if needed, keeps working |
|
DMX512 LED Strips |
DMX512 protocol |
5V, 12V, 24V |
RGB, RGBW |
Works with DMX systems, supports complex effects |
You can pick single-color strips for simple accent lighting or RGB strips for colorful effects. RGBW strips add a pure white chip for better white light. If you want more control, addressable strips let you change colors for each LED. DMX512 strips work well for advanced setups.
Tip: Single-color led strip lights use less energy than RGB or RGBW strips. RGB strips need more power because they have extra color chips. If you want to save energy, choose single-color strips for basic led strip lighting.
Picking the right power supply is important for safe and reliable led strip lights. Here are some things you should check:
Match the power supply voltage to your led strip lights (usually 12V or 24V).
Add up the total wattage of your strips and add a safety margin of 20% or more.
Make sure the power supply can handle the current your strips need.
Choose a constant voltage supply for most led strip lights.
If you want dimming, check that your power supply works with your dimmer or controller.
Look for waterproof power supplies for outdoor or wet areas.
High-quality power supplies help prevent flicker and keep your lights running smoothly.
You need the right tools and accessories for a smooth installation. Here’s a quick checklist:
Power supply that matches your led strip lights voltage and wattage.
Scissors or a sharp blade to cut strips at marked points.
Connectors for joining strip sections.
Controllers or dimmers for color and brightness control.
Aluminum mounting channels for heat dissipation and protection.
Mounting clips or brackets for secure attachment.
End caps to keep out dust and improve durability.
Using mounting channels and clips helps your led strip lights last longer. They protect against heat and dust, and give your setup a clean look.
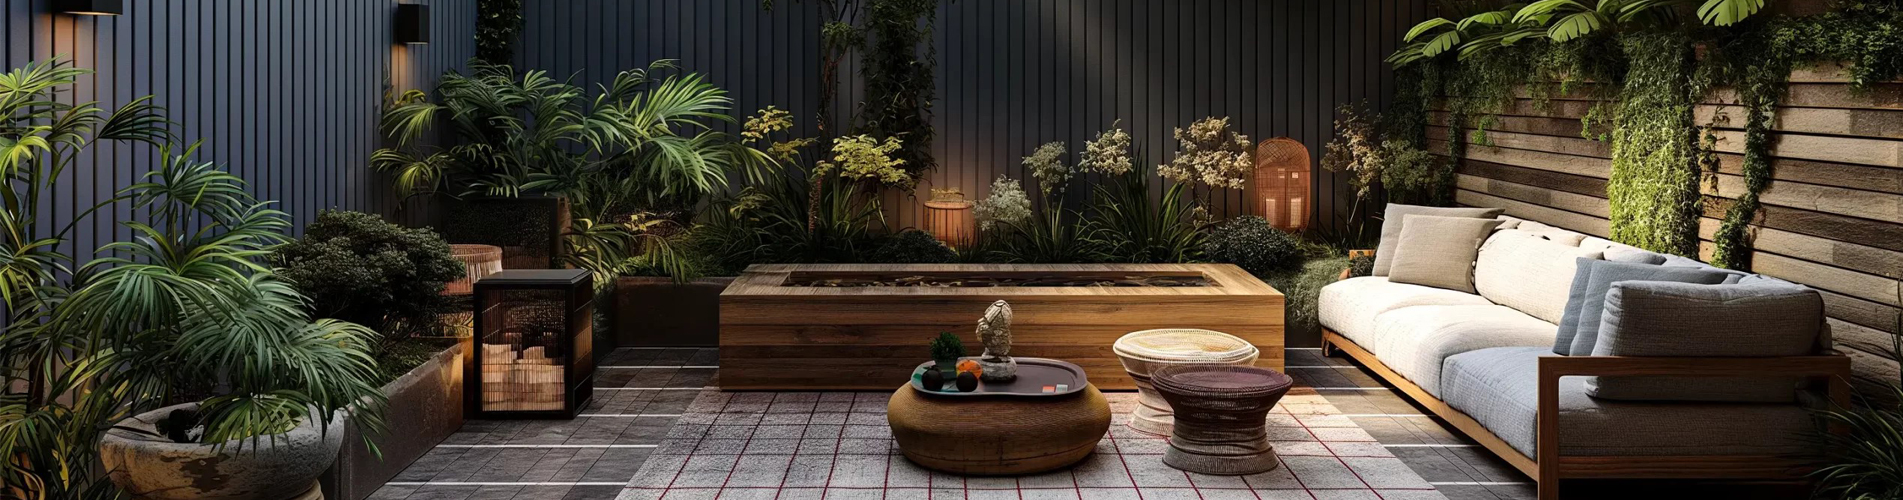
Before you install led strip lights, think about where you want them. Popular spots in homes include under kitchen cabinets, along stairways, behind TVs, and around window frames. You can also add them to your closet, plant shelves, or even outside on a pergola. Many people use led strip lights on the wall or ceiling to create a modern look and add depth to a room. Motion-sensor strips work well in hallways and staircases for safety and energy savings.

Take a moment to look at your space. Decide if you want to highlight a wall, brighten a shelf, or add a glow to your ceiling. Make sure you choose the right type of led strip lights for each area. For example, use waterproof strips outdoors and brighter strips for workspaces.
Grab a tape measure and check the length of each area where you plan to install the strips. Measure along the wall, under cabinets, or around corners. Write down your numbers so you do not forget. Mark the start and end points with a pencil. This step helps you avoid common mistakes like cutting strips in the wrong place or picking the wrong length. If you want to install led strip lights on a wall with corners, plan how you will handle turns. Some strips bend, but others need connectors.
Tip: Always measure twice before you cut. Only trim led strip lights at the marked cut points to avoid damage.
Clean surfaces help your led strip lights stick better and last longer. Dust, grease, or even tiny dirt can stop the adhesive from working. Use a dry cloth first to wipe away loose dirt. Next, use rubbing alcohol on a clean cloth to remove grease or sticky spots. For tough stains, use mild soap and water, but do not soak the wall. Let everything dry completely before you install the strips.
If your wall is rough or the adhesive does not seem strong, try high-quality double-sided tape like 3M VHB or use mounting clips. These extra steps keep your led strip lights from falling off, even in humid or hot rooms.
Note: Proper cleaning and using the right tape or clips will help your led strip lights stay on the wall and look great for years.

You want your led strip lights to fit perfectly, so start by measuring the area where you plan to install. Always disconnect the power before you cut anything. Look for the marked cut points on your strip—these usually have a scissor icon or copper pads. Use sharp scissors or a utility knife for a clean cut right at the mark. If you cut outside these points, you might damage the circuit and your led strip lights may not work.
Here’s a simple step-by-step guide for cutting:
Unplug the power supply to stay safe.
Find the cut marks on your led strip lights. These are easy to spot.
Measure the length you need for your wall or furniture.
Cut straight through the center of the marked point using sharp scissors.
If you need to reconnect segments, use clip connectors or solder the ends for a strong join.
Double-check the polarity when reconnecting. Match the + and – sides.
Never cut while the strip is powered or use dull tools.
Tip: Always test the cut piece before you install it. This helps you catch any problems early.
Sometimes, you need to join two pieces of led strip lights on wall corners or around furniture. Start by checking your strip type—single-color, RGB, or RGBW. Pick connectors that match your strip’s voltage and pin layout. For most home projects, solderless connectors work well and save time. If you want a permanent connection, soldering is best.
Follow these steps to connect segments:
Cut both strips at the marked points.
Line up the copper pads and make sure the + and – match.
Slide the ends into a snap-in connector or solder them together.
Use locking connectors for a secure fit, especially if you plan to install led strip lights on wall areas that get bumped.
For long runs, use LED splitters or amplifiers to keep the brightness even.
Always check the total wattage and make sure your power supply can handle it.
Note: Waterproof connectors are great for kitchens or bathrooms. They keep your connections safe from spills.
Now you’re ready to install led strip lights on wall surfaces or inside furniture. Start by cleaning the area with rubbing alcohol and let it dry. This step helps the adhesive stick better. Peel off the backing and press the strip onto the wall section by section. Go slow to avoid crooked lines or bubbles.
For a clean look, try these tips:
Use mounting clips or aluminum channels for extra hold, especially on vertical walls.
Hide wires behind furniture, under cabinets, or in cable concealers.
For corners, use flexible connectors so your led strip lights on wall stay flat and neat.
If you want a modern look, install led strip lights on wall behind crown molding or inside channels.
Press the strip firmly as you go. This helps the adhesive grip and keeps your led strip lights on wall from peeling.
Pro Tip: Aluminum channels not only make your led strip lights on wall look sleek, but they also help with heat and protect the strip from dust.
If you install led strip lights on wall in visible spots, hide the wires using cable concealers, paintable wire channels, or by tucking them behind furniture. For under-cabinet or shelf lighting, run wires along the back edge and secure them with adhesive clips. You can also use decor items like books or plants to cover any exposed wires.
You’re almost done! Now it’s time to connect your led strip lights to the power supply. Always double-check that the voltage matches your strip. Use a power supply with at least 20% more wattage than your total strip length needs. Connect the wires, making sure the + and – line up. Insulate any exposed connections with electrical tape or heat shrink tubing.
Here’s how to stay safe and get the best results:
Use a power supply that matches your led strip lights voltage and wattage.
Never overload the power supply. This can cause overheating or even fire.
Keep wires short and use thick, high-quality cables to avoid voltage drop, especially if you install led strip lights on wall across a large room.
For outdoor or kitchen installs, use waterproof connectors and enclosures.
Test your led strip lights on wall before you finish. Look for even brightness and check for flickering.
If you see dim spots, you might need a power booster or to split the power feed.
If your led strip lights on wall don’t turn on, check the polarity and all connections.
Safety Alert: Always turn off the power before you connect or adjust anything. If you’re not sure about wiring, ask an electrician for help.
When you install led strip lights on wall or in furniture, planning ahead makes a big difference. Clean surfaces, careful measuring, and hiding wires all help your project look professional. With these steps, you’ll know exactly how to install led strip lights on wall, under cabinets, or anywhere you want to add a modern glow.
You’ve finished installing your led strip lights, so now it’s time to make sure everything works just right. Testing before you secure the strips to the wall can save you a lot of trouble later. Here’s a simple way to check your setup:
Connect your led strip lights to the power supply, but don’t press them onto the wall yet.
Turn on the lights and look for even brightness and color along the entire strip.
If you see any dark spots or flickering, check the connections right away.
Double-check that all wires are secure and the power supply matches your strip’s voltage.
If everything looks good, you can finish pressing the strips onto the wall or inside your furniture.
Tip: Always test your lights before you stick them to the wall. This makes fixing any issues much easier!
Sometimes, things don’t go as planned. If your led strip lights don’t turn on or look strange on the wall, try these steps:
Power Supply Failure: If nothing lights up, test the outlet with another device. Make sure the power supply matches the voltage of your led strip lights.
Loose Connections: Check every connector and make sure they click into place. Tighten any loose wires.
Flickering Lights: This often means the power supply can’t handle the load or there’s a loose connection. Upgrade your power supply or secure the wires.
Uneven Lighting or Voltage Drop: If the strip looks dim at the far end of the wall, shorten the strip or use thicker wires.
Overheating: Make sure your strips have space to breathe. Don’t press them too tightly against the wall or cover them with heavy materials.
If you still have trouble, try removing any dimmers or controllers to see if they cause the problem. Sometimes, replacing a faulty power supply or strip is the best fix.
Keeping your led strip lights safe and bright is easy if you follow a few simple rules:
Use strips and power supplies with safety marks like UL or CE.
Match the voltage of your power supply to your led strip lights.
Always use proper connectors—never leave bare wires exposed on the wall.
Install strips in well-ventilated spots to avoid overheating.
For bathrooms or kitchens, use waterproof strips and seal all connections.
Keep strips away from flammable things like curtains or paper on the wall.
Clean your strips and the wall regularly to prevent dust buildup.
Check for loose wires or damage every few months.
Note: Running your lights at 70-80% brightness can help them last longer and keep your wall looking great.
You just learned how to plan, install, and test your new lighting. Now you can enjoy a brighter, more stylish space. Many people love how these lights last for years, save energy, and make rooms feel special.
You can set the mood, highlight your favorite spots, and even make outdoor spaces more inviting.
Want to share your project or get advice? Try forums like Forest River Forums or the Shine Lighting Community Zone.
If you need help, reach out to a licensed electrician or check out detailed guides and support from lighting experts.
Tip: Try different placements and colors to see what works best for your home!

 Our Store


 IPv6 network supported
 English
 français
 español
 العربية
 한국의
한국의